When a shipment of TCT saw blades arrives, a good incoming inspection should answer three questions: Did you receive what you ordered? Is there any visible damage or safety concern? And does the sampled product meet the specifications agreed before production?
This guide gives importers a practical inspection sequence, from checking cartons and selecting samples to measuring blades and documenting a problem. It applies to carbide-tipped circular saw blades used for wood, aluminum, steel, and other materials at a general level. Product-specific safety and performance requirements, however, depend on the blade application, machine, market, and purchase agreement.
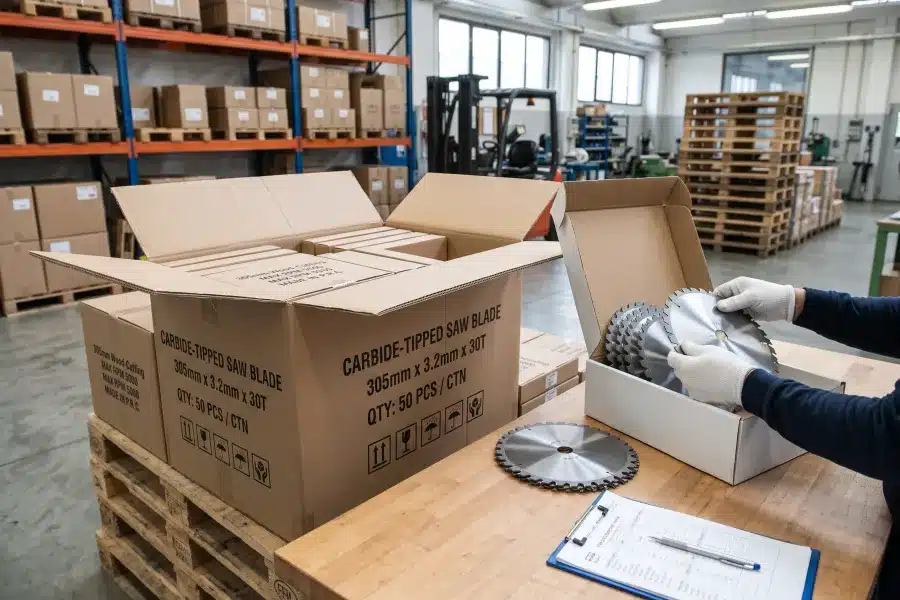
Table of Contents
- What Should You Have Ready Before Inspection?
- What Can the Cartons Tell You Before You Open Them?
- How Should You Select Samples from the Lot?
- What Should You Check on Each Sampled Blade?
- When Does a Runout Check Add Useful Evidence?
- When Is a Trial Cut Worth Performing?
- How Do You Decide Whether to Accept the Lot?
- What Should You Do If You Find a Problem?
- Quick TCT Saw Blade Incoming Inspection Checklist
- Conclusion
What Should You Have Ready Before Inspection?
Before opening cartons, find the approved product specification. It gives the receiving team a shared answer to a simple question: what counts as acceptable for this order?
There is no single incoming inspection standard that defines an acceptable TCT saw blade for every application. Start with the purchase order, approved drawing, approved sample, and acceptance criteria agreed for that order.
In most cases, the inspector needs only a small set of order-specific references:
- The purchase order and packing list
- The latest approved drawing or specification
- The approved sample, packaging artwork, or test criteria when applicable
- The sampling plan and defect definitions agreed for the order
Check the revision before using any document. A quotation, catalog page, and approved drawing may show different versions of the same blade.
If these references do not agree, pause the inspection and resolve the revision first. Measuring more blades will not solve an unclear specification. For the next order, our guide to writing an effective TCT saw blade RFQ explains what to define before production.
What Can the Cartons Tell You Before You Open Them?
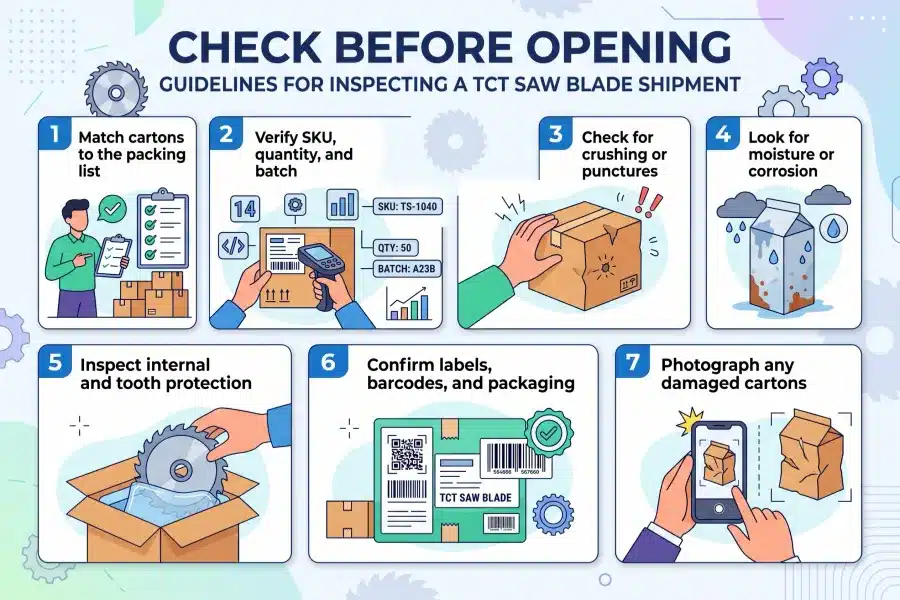
The outside of the shipment often tells you where to inspect more closely. Look at the cartons and pallets before individual blades and packages become separated.
Compare the packing list with the cartons and pallets. Check the SKU, quantity, batch or lot identification, carton numbers, and destination labels. If traceability was required, confirm that the markings allow a blade or inner package to be connected to the relevant production or shipment lot.
Pay particular attention to:
- Crushed corners, punctures, opened seals, or shifted cartons
- Water stains, condensation, damaged moisture barriers, or signs of corrosion
- Broken internal supports or blades moving freely inside a package
- Missing tooth protection or contact between carbide tips
- Incorrect retail packaging, artwork, barcodes, or warning labels
A damaged carton does not automatically mean that the blades are unacceptable. It does tell the inspector where to look more closely. Photograph the carton before opening it, keep its identification visible, and inspect samples near the damaged area separately from samples taken elsewhere.
How Should You Select Samples from the Lot?
A useful sample should represent the shipment, not merely the cartons that are easiest to reach. Take samples from different pallets, carton positions, and layers, and record where each sample came from.
For formal lot acceptance, buyers may use ISO 2859-1 or ANSI/ASQ Z1.4. Both are sampling systems, not TCT saw blade specifications. The lot size, inspection level, sampling plan, and Acceptance Quality Limit (AQL) work together to determine the sample and acceptance rules. AQL should therefore be selected as part of the buyer-supplier quality agreement, not copied from an unrelated inspection checklist.
The same principle applies to defect classification. A visible plate crack and a light cosmetic mark should not carry the same consequence. Buyers often classify defects as critical, major, or minor, but the definitions and acceptance numbers need to be agreed for the product and market.
If no statistical plan was agreed for a small trial shipment, the buyer can still inspect a documented selection from across the lot. The result should be described as a limited inspection, not as compliance with an AQL plan.
What Should You Check on Each Sampled Blade?
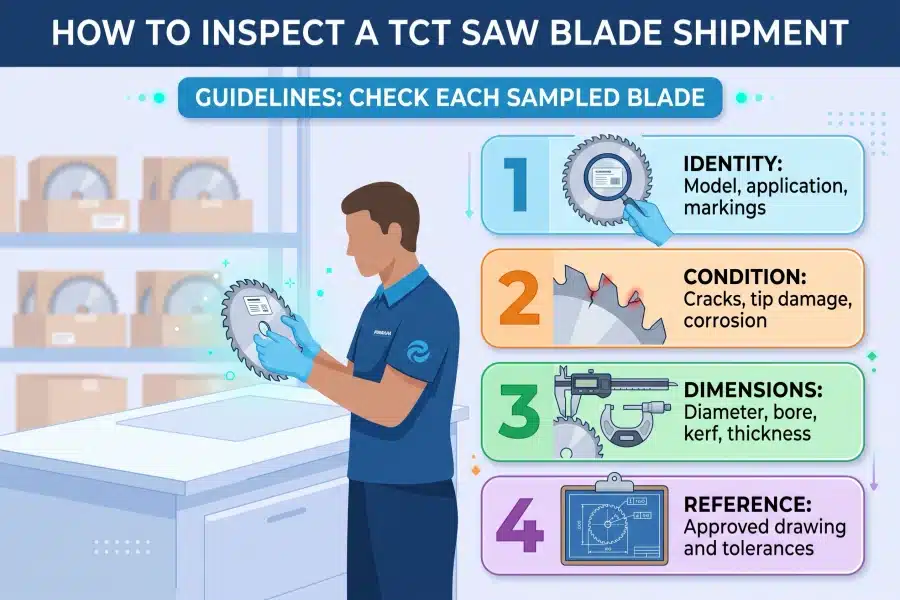
Each sampled blade should be checked in three passes: confirm what it is, look for visible problems, and measure the features controlled by the order. This keeps the inspection consistent without turning every cosmetic variation into a product failure.
Confirm the Blade Identity
Check the model, intended application, dimensions printed or marked on the blade, tooth count, rotation direction, maximum speed marking, brand artwork, and lot identification where specified. Compare labels and markings with the approved version rather than with memory or a similar SKU.
Markings must also make sense together. A correct diameter printed on the blade does not compensate for an incorrect bore on the physical product. Likewise, a blade should not be accepted for a machine simply because the package description appears suitable. The actual blade specification and the machine manufacturer’s instructions still control compatibility.
Look for Visible Damage or Defects
Under suitable lighting, examine both faces of the plate, the bore, drive features, slots, gullets, and every carbide tip in the sample. Look for:
- Visible cracks, severe dents, or obvious plate distortion
- Missing, cracked, or badly chipped carbide tips
- Obvious irregularities around the carbide-tip joint
- Damage around the bore, pinholes, keyways, gullets, or slots
- Corrosion that may affect the blade rather than a removable surface stain
- Coating, grinding, printing, or packaging defects covered by the agreed specification
A visible crack, missing tip, or badly damaged joint area is a reason to place the affected product on hold and investigate it. Visual inspection alone, however, cannot prove carbide grade, base-plate steel grade, heat-treatment quality, residual stress, plate tension, braze strength, dynamic balance, or expected service life. Those characteristics may require supplier records, calibrated production tests, laboratory analysis, destructive testing, or a controlled cutting program.
This boundary is important. A blade can look clean and still fail an unobserved requirement. It can also show a harmless cosmetic variation that has no effect on cutting. The agreed defect definitions should separate appearance requirements from fit, function, and safety concerns.
For woodworking tools and circular saw blades within its scope, EN 847-1:2017 addresses safety requirements and methods for reducing hazards. It is not a universal acceptance standard for every TCT blade used to cut wood, aluminum, or steel.
Measure the Dimensions That Matter
The inspection drawing should identify both the nominal value and the allowed tolerance. Depending on the blade, the checks may include:
- Outside diameter
- Bore diameter
- Tooth count
- Kerf width
- Plate thickness
- Pinholes, keyways, or other drive features
- Features or tooth geometry specifically controlled by the drawing
Use a measurement method suitable for the feature and tolerance. A caliper may be adequate for some general checks, while a micrometer, bore gauge, plug gauge, optical system, or dedicated fixture may be needed for tighter requirements. Measuring equipment should have sufficient resolution and a known calibration status.
Compare every result with the approved drawing or purchase specification. Do not apply a tolerance taken from another blade diameter, application, or supplier. For background on individual dimensions, see our guides to circular saw blade sizes, arbor size, and saw blade kerf.
When Does a Runout Check Add Useful Evidence?
Runout measurement can reveal movement that is not obvious during a basic visual check, but the result is meaningful only when the setup and acceptance limit are defined.
For a runout check, make sure the blade, test arbor, and clamping faces are clean. Use an appropriate, verified arbor and flange arrangement. Record where the indicator contacts the blade, how the blade is clamped, and whether axial or radial movement is being measured. Rotate the blade slowly for a static measurement unless the agreed procedure specifies otherwise.
Fixture error matters. Dirt on a flange, play in the arbor, an unsuitable reducing ring, or inconsistent clamping can create an apparent blade problem. If a result is unexpected, remount the blade and verify the setup before reaching a lot decision.
The acceptance limit should come from the approved drawing, inspection agreement, or another clearly applicable technical requirement. This guide does not assign one universal runout limit because blade size, construction, measurement position, and application all matter.
When Is a Trial Cut Worth Performing?
A trial cut can reveal an obvious mismatch or functional problem, but it should be performed only when the blade, machine, material, and test conditions are suitable. Not every incoming inspection requires one.
Use a compatible machine, blade speed, workpiece, guarding, and cutting conditions. The machine and arbor must be in suitable condition. For example, the U.S. woodworking-machinery requirements in OSHA 29 CFR 1910.213 address machine construction, guarding, arbors, and mounting. OSHA 1910.213 is a workplace and machinery safety rule, not a product acceptance standard for TCT saw blades.
Record the sample ID, machine, material, speed, feed conditions, and observations. Depending on the application, useful observations may include cut finish, chipping, burr formation, burning, vibration, unusual noise, and feed stability. Compare the result with an approved sample or agreed test criteria whenever possible.
A short trial cut can identify an obvious mismatch or defect. It cannot establish the expected service life of an entire shipment. A meaningful blade-life comparison requires a separate test plan with controlled materials, machines, cutting conditions, endpoints, and enough samples to support the conclusion.
How Do You Decide Whether to Accept the Lot?
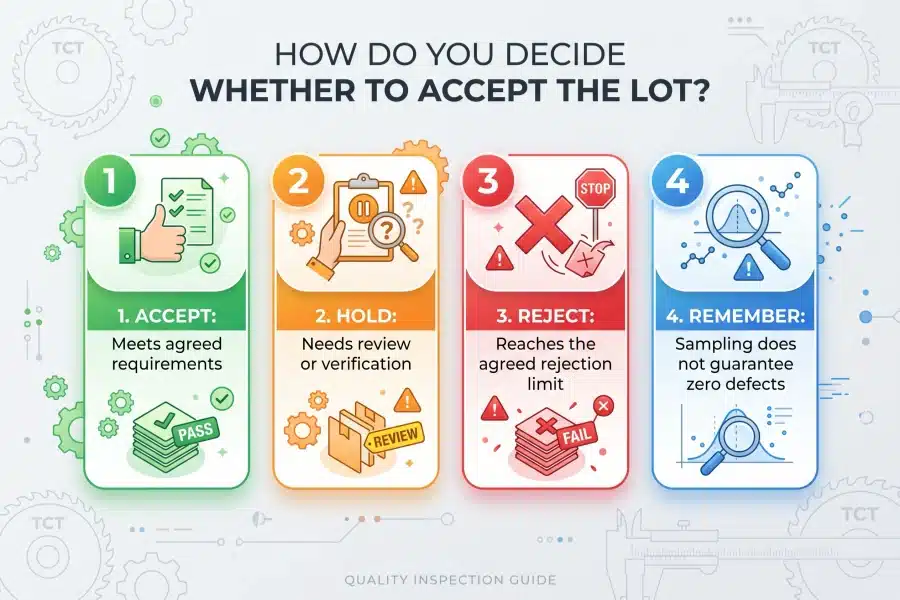
The inspection result should lead to a defined disposition: accept the lot, hold it for review, or reject it or request corrective action under the purchase agreement. The decision should follow the agreed sampling and acceptance rules rather than the inspector’s overall impression.
Accept when the sample meets the applicable document, visual, dimensional, and test requirements under the agreed plan.
Hold for review when a result is uncertain, documents are missing, the measurement setup needs verification, or the buyer needs technical input before deciding. A hold prevents questionable blades from entering stock or production while keeping the investigation open.
Reject or request corrective action when the result reaches an agreed rejection condition. The commercial remedy may involve sorting, reinspection, replacement, rework, credit, or another solution defined by the order and agreed by the parties.
Passing an acceptance sample does not prove that every unit in the lot is defect-free. Acceptance sampling manages lot-level risk. It should not be described as 100% inspection unless every unit was actually inspected for the stated characteristics.
What Should You Do If You Find a Problem?
When a problem appears, protect the evidence before discussing the cause. A clear record helps the supplier reproduce the issue and helps both parties distinguish a product defect from transport damage or measurement error.
- Stop using the affected blades and identify the lot as on hold.
- Keep the blade, inner package, carton label, and lot information together.
- Photograph the condition with the sample ID and a scale reference where useful.
- Record the lot size, sample size, number affected, defect description, and document revision.
- Record the measuring instrument, fixture, measurement location, and test conditions.
- Recheck the setup when the result could be caused by the arbor, flange, gauge, or mounting method.
- Send the supplier a structured nonconformity report and request the evidence needed for review.
Avoid jumping from one failed sample to an unsupported explanation such as poor steel, weak brazing, or incorrect heat treatment. Describe what was observed first. Root-cause analysis can follow with production records, retained samples, additional inspection, or laboratory testing.
Quick TCT Saw Blade Incoming Inspection Checklist
The checklist below is a quick sequence for use after the acceptance criteria have been agreed. It is a summary of the workflow, not a substitute for the drawing, sampling plan, or inspection record.
- Confirm the basis: PO, approved drawing, revision, and acceptance criteria.
- Check the shipment: cartons, labels, moisture, and transport damage.
- Select samples: take them from different parts of the lot.
- Verify the blades: model, markings, specifications, and traceability.
- Inspect condition: cracks, tip damage, distortion, and corrosion.
- Measure dimensions: compare results with the approved tolerances.
- Test if required: check runout or perform an agreed trial cut.
- Record the decision: accept, hold, or reject the lot.
Conclusion
Reliable incoming inspection begins before the shipment leaves the supplier. The buyer and supplier need the same drawing, revision, tolerances, sampling plan, defect definitions, and test conditions. Once those references are clear, the receiving team can inspect the shipment in a logical order and make a defensible lot decision.
Incoming inspection also has limits. Visual checks and basic measurements cannot prove every material, process, or life-performance characteristic. When those characteristics matter, require appropriate production records or a separate verified test. A clear TCT saw blade RFQ is the best place to define those expectations before production starts.